After reading the previous post by now you should have Jira installed on your laptop, so we can start playing around. In this post, we’re going to use ScriptRunner to satisfy a family of similar business requirements.
Business requirements
As a Jira administrator, you can face the necessity to implement something like this:
- Only managers can approve purchase requests below 1000 USD. However, requests above this amount require the director’s approval.
- Whenever the implementation of a user story is estimated to take over 8 story points, it needs the tech lead’s approval.
- Hiring requests for more than 5 people need to be approved by the HR manager.
As you can notice, they are all similar:
those who perform a given role are the only ones who can change the state of a request whenever some value on the request exceeds a given threshold. Translating this to Jira terms: whenever the value of a custom field is exceeded, only a user with a given project role can execute a transition.
This can be implemented either as a workflow condition or a validator. My personal preference is to implement such requirements using validators. Why? Because conditions, when not met, hide the buttons used for executing transitions, so people often don’t understand why they not displayed, and the next thing they do is call the Jira administrator to ask a question. When you’re working for a large organization, that means a lot of unnecessary questions asked. Validators, on the other hand, don’t hide the buttons, but instead, they show a customized message explaining why this transition can’t be executed and what to do about it. As you can imagine, with a proper message, this redirects all the questions to the right person, which is most often not the Jira administrator. So there, some advice that will make life easier for you and your users.
Now that we know we want a validator, the questions are: which transition to put it on, and how to implement it?
For the sake of this example, we’re going to implement business requirement no. 2, the one with the tech lead. The remaining ones are analogous, so you’ll be able to adjust the implementation to those cases easily.
Implementation
My local Jira Software Server instance already has a sample project with the default workflow for the Story issue type, so let’s use this. I am going to assume the field that our validator is going to inspect is called Points, which is a numeric standard field that exists in a standard Jira Software installation. I’ve just added it to the screen used by the Story issue type.
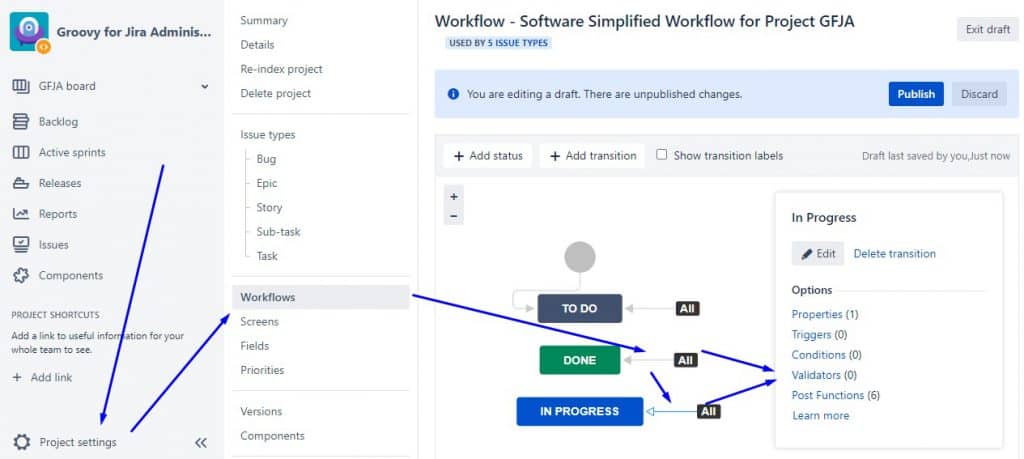
Now, we can add a validator to either one of the two transitions, so that the tech lead is the only one who can potentially start progress on an issue, or close it. Let’s not get into the discussion if the validator should be on the Done transition, it’s something that should be discussed with the tech lead. I will add it just to the In progress transition:
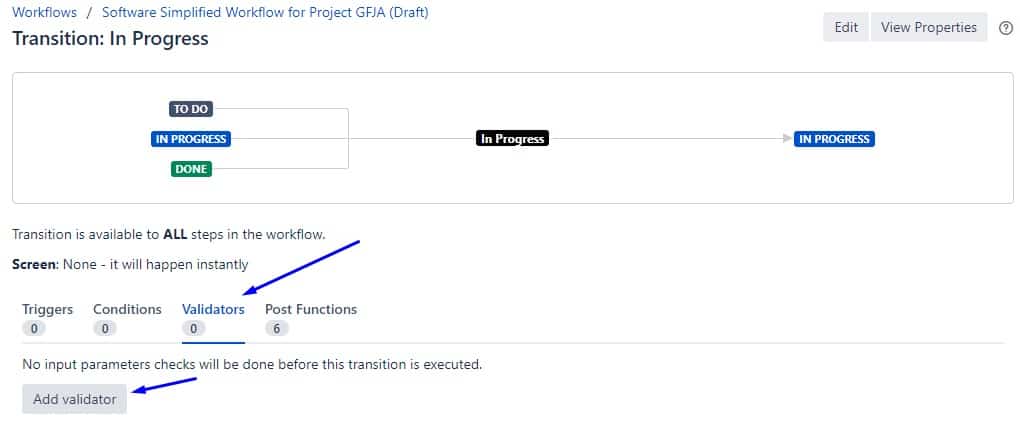
Once you select the In progress transition and click Validators, you’ll see:
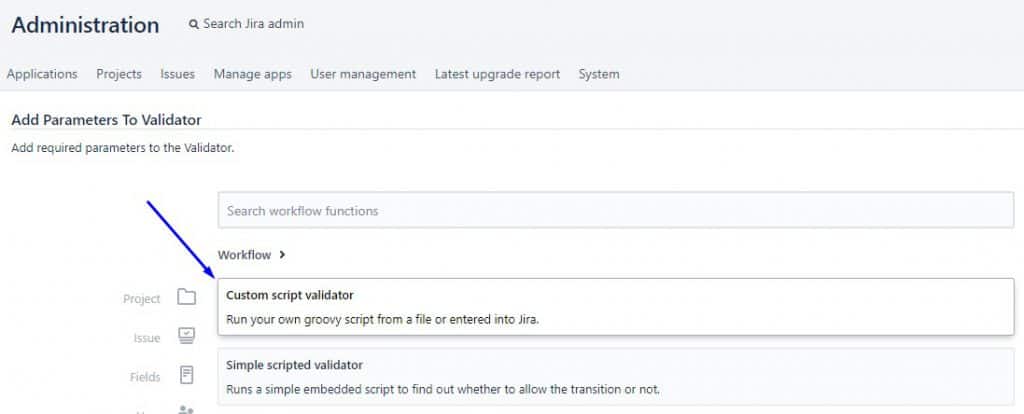
Just press the Add validator button,select the Script validator and click Add:
Then select the Simple scrited validator:
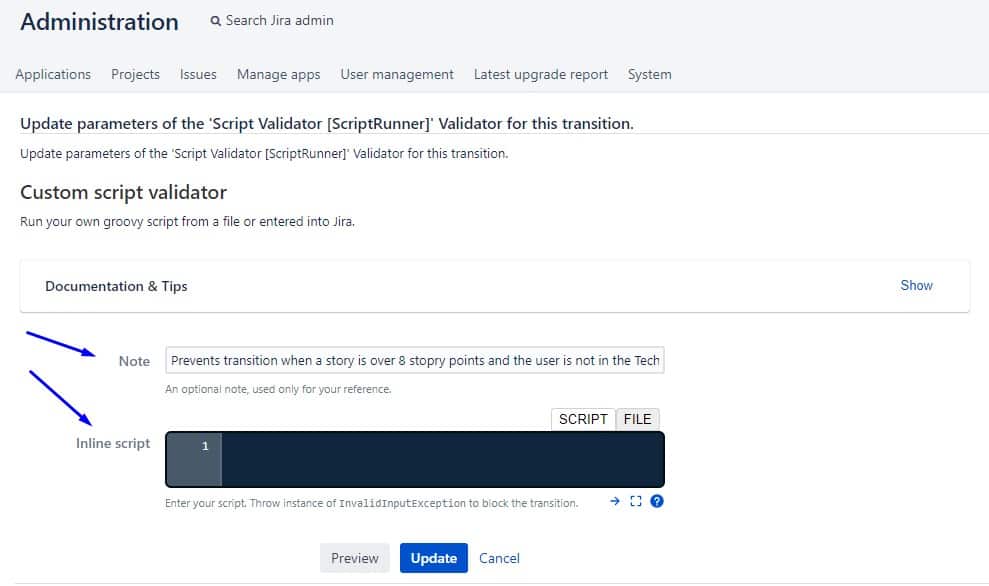
At this point. it’s good to describe your validator so that in the future you will know what it does, without analyzing its source code. To do this, fill in the Notes with a relevant description. It will be shown in the list of your validators on a workflow transition later. Next, we will fill in the Inline script with code. First, click the small right-pointing arrow at the bottom-left of the script console to make the window a bit bigger for convenience:
Source code
At this point, we’re going to implement the body of the script.
What we need to do is to:
- Check if the number of story points on the issue being processed is less or equal to 8
- If it is, we need to carry on with the execution of the transition
- If it isn’t, then we need to check if the user executing the transition has the Tech Lead role in this project
- If they do, we carry on with the execution of the transition
- If they don’t, we do not allow for the transition to be executed
// these imports tell ScriptRunner which classes we
// are going to use from what Jira has to offer
import com.atlassian.jira.component.ComponentAccessor;
import com.atlassian.jira.project.ProjectManager;
import com.atlassian.jira.security.roles.ProjectRoleManager;
import com.atlassian.jira.security.roles.ProjectRoleActors;
import com.opensymphony.workflow.InvalidInputException

// let's define some contstants
final ERROR_MESSAGE = "Only tech leads can start work on stories exceeding 8 story points"
final ROLE_NAME = "Tech Lead"
final MAX_STORY_POINTS = 8
final POINTS_CUSTOM_FIELD_ID = "customfield_10106"

// we need to get the custom field object representing the Points custom field
def customField =
      ComponentAccessor.getCustomFieldManager()
          .getCustomFieldObject(POINTS_CUSTOM_FIELD_ID)
// then we get the value stored in the Points custom field in the current issue
def storyPoints = issue.getCustomFieldValue(customField)
// if the value is not set, or if it's below our threshold,
// we allow the transition to be executed and this stops the code from going further
if( !storyPoints || ((int)storyPoints) <= MAX_STORY_POINTS ) {
    return true
}

// if we got here, then the Points field was set and its value exceeded our threshold
// time to check the role of the logged in user
// we need some managers to interact with roles
def ProjectManager projectManager = ComponentAccessor.getProjectManager()
def ProjectRoleManager projectRoleManager =
     ComponentAccessor.getComponent(ProjectRoleManager)
// let's retrieve the tech lead project role
def projectRole = projectRoleManager.getProjectRole(ROLE_NAME)
// it may not be defined, in such case the user does not have it, so we need to bail out
// with an error message, this stops the code from executing further
if( ! projectRole ) {
	throw new InvalidInputException(ERROR_MESSAGE)
}

// if we are here, then the role does exist, and we need to check if our user has it
// let's get the users who have this role
def ProjectRoleActors projectRoleActors =
      projectRoleManager.getProjectRoleActors(projectRole, issue.getProjectObject())
// let's display these users in a log
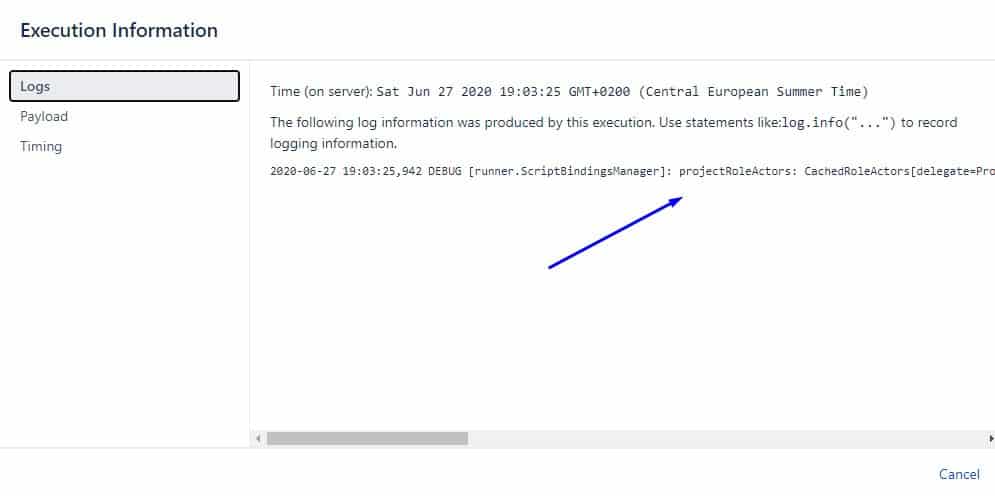
log.debug 'projectRoleActors: ' + projectRoleActors
// let's get the currently logged in user
def currentUser = ComponentAccessor.jiraAuthenticationContext.getLoggedInUser()
// and chcek if our user is in the list of users having our role.
// If not, we will display an error message, and bail out
if( ! projectRoleActors.getUsers().contains(currentUser) ) {
    throw new InvalidInputException(ERROR_MESSAGE)
}
// otherwise, the user has this role and is allowed to execute the transition
return true
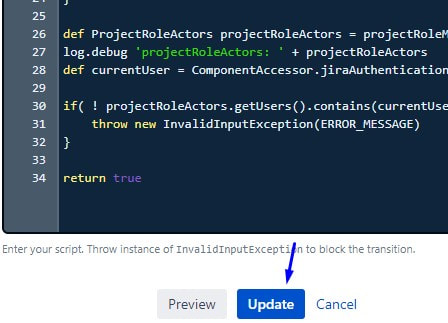
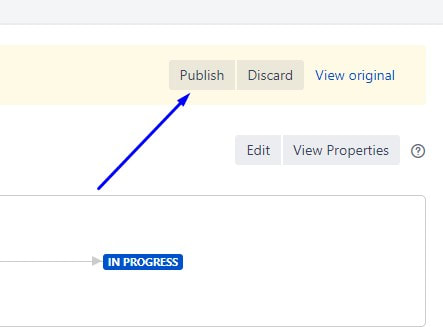
Now click the Update button, and don’t forget to Publish your workflow, otherwise the validator won’t be activated:
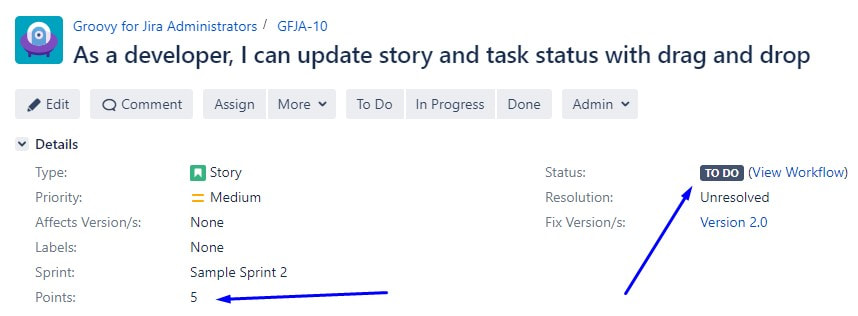
It’s time to test if the validator works. I’m now logged in as the mentorship4u user, who is not in the Tech Lead role. I added the Tech Lead role to Jira earlier. Let’s go to a story and set the Points to, say, 5, which is below our threshold. The status is now To do, and clicking the In Progress button changes it to the desired status:
Now let’s change it back to To do and edit the story points so that they exceed 8:
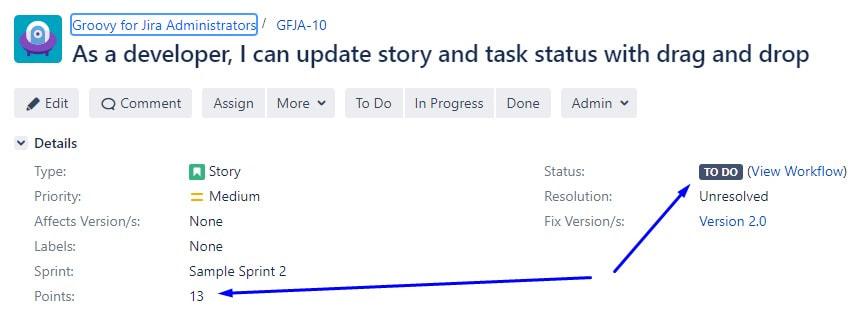
Let’s see if we can change the status to In progress now, click the In progress button and you’ll get:
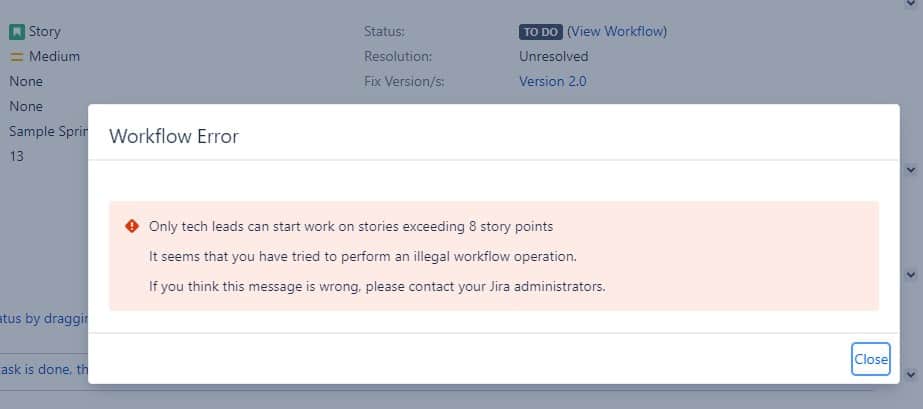
Perfect. Works as intended. Now you can also go to the workflow view to see how the validator performs. After a few executions you’ll see something like this:
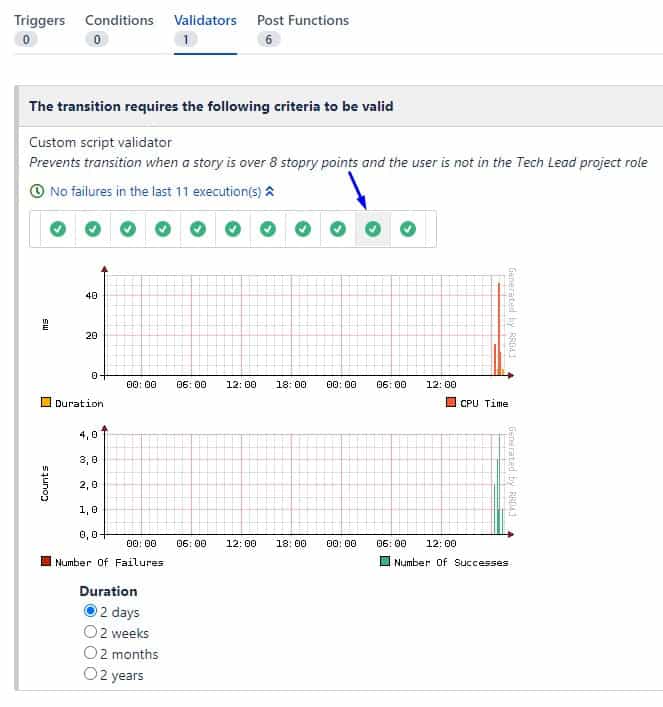
By clicking any of the ticks representing a successful execution of the validator, you’ll get more information. In this case, the logged value the projectRoleActors variable. We did that in line 28 of our validator. The results are:
Summary
We have created a validator that takes two aspects into consideration: the user’s role, and the value of a custom field on an issue, and implements simple logic that prevents the execution of the transition based on the two conditions.
You learned how to:
- Check the project role of a user
- Retrieve the value of a custom field
- Compare the value with a given threshold
- Display an error message
- Add custom scripted validators to your workflows
- Log values and view the results of your validator’s execution
- Test your validator
Try it out in practice, and remember always to test in a test environment first, and move to production later. Be aware that the custom field IDs may be different on your test and production environments, so simply copying and pasting your script to production may not work, it may need some minor adjustments in the process.
Let me know in the comments how you liked it, and if it worked for you.
Also, please share this article with your colleagues so that there’s more of us, this way everybody can learn from anybody else and we will all get better faster.


